
When it comes to preparing a delicious brisket, getting the cooking time just right can make all the difference. I remember my first attempt at slow-cooking brisket—it was a bit of a guessing game, and let’s just say the result was far from perfect. But over time, I’ve learned that accurate timing is crucial for achieving that tender, juicy texture we all love.
One of the key lessons I’ve learned is the importance of balancing time and temperature. A brisket isn’t just about tossing meat on a grill or smoker; it’s about understanding how these two elements work together. Whether you’re using a smoker or your oven, monitoring the internal temperature is essential. For instance, aiming for an internal temperature of 190°F to 205°F ensures the meat becomes tender and flavorful.
In this guide, I’ll share practical techniques and reliable methods for estimating cooking durations, all backed by real-world experience. We’ll explore how to navigate various cooking techniques while emphasizing the importance of meat quality. By the end of this guide, you’ll be equipped with the knowledge to perfectly cook a brisket every time, ensuring it’s as tender as it is tasty.
Understanding the Importance of Cooking Time
When it comes to achieving the perfect brisket, the cooking time plays a pivotal role in the final outcome. Accurate timing ensures that the brisket develops a tender texture and rich flavor. Even a slight deviation from the ideal time can significantly alter the dish’s quality.
The science behind cooking times reveals that each minute counts. For instance, in an oven, a temperature shift of just 10 degrees can add or subtract up to 30 minutes of cooking time. This is why minute-by-minute monitoring is crucial, especially when nearing the end of the cooking process.
The type of oven you use also impacts the overall cooking duration. Conventional ovens, convection ovens, and smokers each have different heating patterns, which can affect how evenly the brisket cooks. Understanding these variables helps you make informed adjustments, ensuring a consistently delicious result.
By grasping these principles, you’ll be better equipped to manage the cooking process and achieve a brisket that’s both flavorful and tender. This knowledge sets the foundation for mastering various cooking techniques and adapting to different oven settings.
Getting to Know Your Brisket
Understanding what makes brisket unique is key to mastering its preparation. This cut of beef is known for its thick, tough connective tissues, which require special attention to become tender. Unlike other meats, brisket thrives under low-and-slow cooking methods, breaking down the collagen into rich, flavorful gelatin.
Selecting quality meat is the first step in any successful brisket recipe. Look for cuts with good marbling, as fat content enhances both flavor and tenderness. Whether you prefer grass-fed or grain-fed beef, the quality of the meat directly impacts the final dish.
During my early cooking adventures, I learned that patience is essential when cooking meat. A particularly memorable experience involved a brisket that, despite hours of cooking, remained tough. This taught me the importance of precise temperatures and times, leading me to always use a meat thermometer for accuracy.
A meat thermometer is indispensable for ensuring your brisket reaches the ideal internal temperature of 190°F to 205°F. This tool guarantees that the meat is not only tender but also safe to eat, making it a crucial part of every brisket recipe.
In summary, understanding your brisket’s unique characteristics and investing in quality ingredients are the foundations of a perfect dish. By grasping these elements, you set yourself up for success in every recipe.
How I Calculate Cooking Time for a Brisket
When it comes to determining the ideal cooking duration for brisket, I rely on a tried-and-true method. This method involves understanding temperature ratios and using a trusty thermometer to ensure precision. I start by establishing a baseline temperature and time, then adjust based on the specific characteristics of the meat.
A key part of my process is referencing reliable charts and data to refine the cooking time. I also always check the brisket’s internal temperature with a thermometer to ensure it reaches the desired 190°F to 205°F. This step is crucial for achieving that perfect tenderness.
Just like when cooking chicken, every piece of meat is unique. Some might require a bit more time, while others could be ready sooner. By making these small adjustments, I ensure each brisket turns out flavorful and tender.
Cooking Time Estimates
When it comes to determining the ideal cooking duration for brisket, I rely on a tried-and-true method. This method involves understanding temperature and weight factors, ensuring precision with a trusty thermometer. I start by establishing a baseline temperature and time, then adjust based on the specific characteristics of the meat.
A key part of my process is referencing reliable charts and data to refine the cooking time. I also always check the brisket’s internal temperature with a thermometer to ensure it reaches the desired 190°F to 205°F. This step is crucial for achieving that perfect tenderness.
Just like when cooking pork or beef, every piece of meat is unique. Some might require a bit more time, while others could be ready sooner. By making these small adjustments, I ensure each brisket turns out flavorful and tender.
These estimates come from tested techniques and factor in specific cooking variables. They help every person who cooks to set realistic expectations. The calculations are flexible and require adjustments based on real-time observations.
Key Factors That Affect Cooking Duration
When it comes to preparing a brisket, the cooking process involves more than just setting a timer. I’ve learned that several factors can influence how long it takes to achieve that perfect, tender result.
One of the most common mistakes is opening the oven door too often. Every time you check, you let heat escape, which can extend the cooking duration. It’s important to have a clear idea of how these interruptions affect the overall process.
Another crucial factor is how you arrange the brisket in the pan. Overcrowding can lead to uneven cooking and a longer time to finish. Giving the meat enough space ensures it cooks consistently, which is key to a successful meal.

If you’re planning to cook multiple dishes at once, timing becomes even more critical. Make sure to plan ahead so each item gets the attention it needs without disrupting the others. This careful planning helps create a balanced and delicious meal.
Consistency is key to a perfect brisket. By minimizing disturbances and keeping an eye on these factors, you can ensure your brisket turns out flavorful and tender every time.
Adjusting Oven Settings for Optimal Results
When it comes to baking a brisket to perfection, adjusting your oven settings can make a significant difference in both texture and flavor. I’ve found that small tweaks in temperature can greatly impact the final result, ensuring a tender and delicious outcome.
To achieve the best results, I rely on a cooking time calculator and conversion charts to guide my adjustments. These tools help me understand how temperature changes can shorten or lengthen the baking time. For example, increasing the oven temperature by 10°F can reduce the cooking time by up to 20%, while lowering it can extend the time by a similar margin.
Using a time calculator is especially helpful when converting between different measurement systems or adjusting for specific brisket sizes. For instance, if you’re baking a smaller brisket, you might reduce the temperature by 15°F to prevent overcooking. This careful planning ensures a consistently better bake every time.
By making these precise adjustments and using reliable tools, you can master the art of baking a brisket that’s both flavorful and tender. It’s all about understanding how your oven settings work together to create the perfect dish.
Mastering the Meat Thermometer
A meat thermometer is your best friend in the kitchen when it comes to ensuring perfectly cooked brisket. I always use a digital meat thermometer to check the internal temperature of my brisket, which should reach 190°F to 205°F for optimal tenderness and safety.
After adjusting the oven temperature, setting a timer is essential to monitor the cooking process accurately. Even a small change in temperature can significantly affect the cooking time, so keeping an eye on the timer helps prevent overcooking.
To get an accurate reading, I insert the thermometer into the thickest part of the brisket, avoiding any fat or bone. This ensures the temperature reflects the meat’s true doneness. I also reference guidelines used for ham and other meats to ensure proper doneness across different dishes.
A reliable thermometer is key to avoiding undercooked or overcooked results. By following these steps and using a high-quality thermometer, you can achieve a perfectly cooked brisket every time.
Step-by-Step Guide to Roasting Your Brisket
Renting a brisket to perfection involves a series of careful steps that ensure tenderness and flavor. Whether you’re a novice or experienced cook, following this guide will help you achieve a delicious result every time.
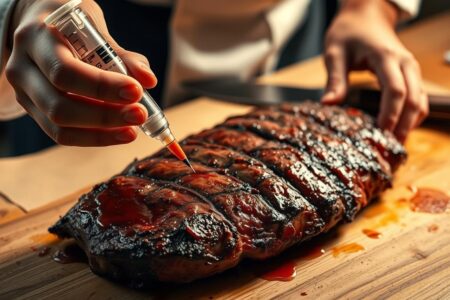
Start by prepping the brisket. Season generously with your favorite spices and let it sit for about 30 minutes to allow the flavors to absorb. While waiting, preheat your oven to 300°F (150°C).
Next, sear the brisket in a hot skillet for 2-3 minutes per side to create a flavorful crust. This step adds texture and enhances the overall taste of the meat.
Place the brisket in a roasting pan, fat side up. Roast in the preheated oven for about 3-4 hours, or until the internal temperature reaches 190°F to 205°F. Use a timer to monitor the cooking progress and a calculator to adjust the roasting time based on the brisket’s size and your oven’s performance.
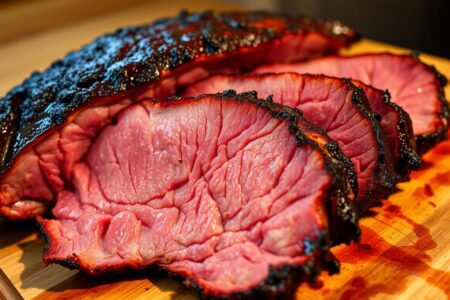
To check for doneness, look for a tender texture when you pierce it with a fork. You can also use a meat thermometer to ensure the internal temperature is within the desired range. If unsure, let the brisket rest for 10-15 minutes before slicing.
Using a timer and thermometer is crucial for achieving perfect doneness every time. By following these steps and making necessary adjustments, you’ll consistently produce a brisket that’s both flavorful and tender.
Tackling Common Cooking Challenges
When it comes to meat cooking, everyone faces challenges. One common issue is uneven cooking, where the outer cut becomes overcooked while the inside stays underdone. This can be frustrating, especially after hours of preparation. To tackle this, I recommend using a reliable guide to help you monitor the brisket’s progress.
A great example of a challenge is overcrowding the oven. When too many dishes are cooked at once, it can affect airflow, leading to longer cooking times. To avoid this, plan your cooking schedule carefully. Use a timer and a guide to ensure each dish gets the attention it needs without disrupting others.
Another common pitfall is not adjusting techniques as needed. For instance, if you notice the brisket is cooking too quickly, lowering the oven temperature can help. This kind of adaptability is key in meat cooking. Remember, every brisket is different, and some may require more attention than others.
By following these practical steps and staying flexible, you can overcome common challenges and achieve a deliciously cooked brisket. Keep experimenting and learning—each attempt brings you closer to perfection!
Wrapping Up Your Perfect Brisket Meal
Your journey to a perfectly cooked brisket is almost complete! With careful planning and attention to detail, you’ve navigated the cooking process seamlessly. Now, it’s time to finish strong and ensure your dish is nothing short of extraordinary.
One of the most crucial final steps is letting the brisket rest. This allows the juices to redistribute evenly, making every bite tender and flavorful. Aim for a resting period of 10–15 minutes before slicing. During this time, the internal temperature will stabilize, ensuring the meat stays juicy and reaches the perfect degree of doneness.
For last-minute adjustments, consider using oven temperature conversion data to fine-tune your cooking process. Whether you’re increasing or decreasing the heat, these slight changes can make a big difference in the final result. Remember, flexibility is key to achieving a dish that’s both delicious and memorable.
In the end, the secret to a fantastic brisket lies in the details—proper planning, precise temperature checks, and a patient approach. By following these steps and staying confident in your process, you’ll create a meal that’s sure to impress. So, take a moment to savor your success and enjoy the fruits of your labor!